If you’ve ever spent hours trying to align a new plastic bumper clip only to have it break mid-install, or spent a whole weekend arguing with a dashboard trim piece that just won’t sit flush, you’ll know how easy it is to rush through plastic auto parts installation—especially when you’re working on your own car, or even on a repair shop floor with a tight schedule. As someone who’s been supplying plastic auto parts for 12 years now, I’ve seen it all: parts returned because they were “faulty” when really the installer stripped a mounting tab, repairs that cost twice as much because someone used the wrong adhesive, and even a few cars that had to go back on the lift because a misaligned side skirt caused wind noise at highway speeds. The good news? Most of these issues aren’t the fault of the part itself. They’re just the result of skipping a few basic, science-backed steps that go beyond “snap it into place.” This post is everything I wish every installer—professional or DIY—knew about getting plastic auto parts right, straight from a supplier who talks to installers and mechanics every single day. Plastic Auto Parts
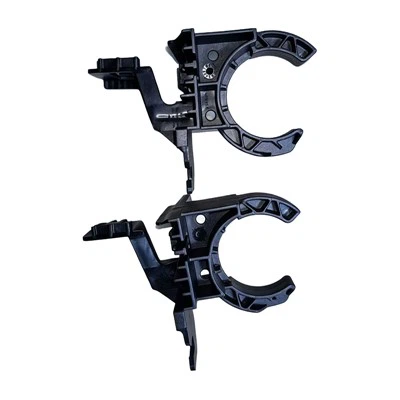
First, let’s start with something that’s way more important than grabbing the new part out of the box: pre-installation preparation. I get it, you’re excited to get the job done, but the 10 minutes you spend here will save you hours (and a few broken parts) later. First, pull out the part and give it a once-over. Yes, we quality-check every part that leaves our warehouse—no corner gets cut here, because we know a faulty part is a waste of everyone’s time—but sometimes shipping or handling during transport can do small, unnoticeable things: a mounting tab might have a tiny mold flash (that thin, excess plastic line from the injection molding process) that wasn’t caught by our QC team, or a clip might have shifted and warped a little in extreme temperatures on a long haul. Run your fingers along every edge, every clip, every mounting hole. If something feels off—if a hole is slightly misshapen, or a tab wiggles more than it should—don’t force it. Contact your supplier (that’s me, the one writing this) and we’ll send a replacement same-day. No questions asked. Don’t make the mistake we see so often of ignoring those small flaws. When you force a part that’s even slightly off, you stretch the plastic beyond its design limits, and it will break later—often on the road, where it’s a safety risk.
Next, clean the mounting surfaces. This is another step that gets glossed over, but plastic doesn’t bond or align right if the surface it’s attaching to is covered in dirt, old grease, or that sticky residue from old adhesive that won’t come off. I remember a regular customer, a mechanic named Jake from a shop in Detroit, told me last month that he’d had three customers bring back new rear bumpers he’d installed because they were coming loose within a week. He finally figured out he was wiping the mounting points with a generic shop rag and a little brake cleaner, which left behind a fine film of grease. Once he started using isopropyl alcohol (at least 70% concentration) and a lint-free microfiber cloth to scrub every inch of the mounting area—twice—his return rate dropped to zero. For plastic parts, this isn’t just a “nice” step; it’s non-negotiable. If you’re using adhesive (for things like dashboard trim, side skirts, or mirror backs), skip the cheap white glue or generic epoxy. We recommend using a structural adhesive specifically formulated for automotive-grade thermoplastics, which is what all our parts are made of. Regular epoxy can be too brittle, and it will crack when the plastic flexes from driving over bumps or temperature changes. We sell these adhesives in small, ready-to-use tubes for DIYers, or bulk for shops, and I always include a small tube with every order of large parts (like bumpers or fenders) because I know how often they’re needed.
Now, the part itself: understanding the material it’s made of, because that changes everything. Almost all the plastic auto parts we supply are either ABS (acrylonitrile butadiene styrene) or PP (polypropylene). ABS is the harder, more rigid stuff—think bumpers, grilles, headlight housings. PP is softer, more flexible—think side skirts, interior trim, fuel tanks. The installation steps change a little for each, and using the wrong method is a fast way to break something. For ABS parts, which are stiffer, the biggest risk is applying too much force. A common mistake with DIYers is trying to snap an ABS bumper into place in one go, which puts uneven pressure on the clips and mounting tabs. Instead, start at the center: align the central mounting hole, push that into place first, then work your way out to the edges, pressing evenly on either side of the part, not just in the middle. I always tell installers to imagine the part is a shelf: if you push down only on the front, the back will lift. Same with plastic parts—distribute pressure evenly to avoid stress cracks.
For PP parts, though, the risk is the opposite. PP is flexible, so it’s easy to pull or stretch it too far when aligning clips, which will cause it to warp permanently. I once had a customer send us a photo of a brand new side skirt he’d installed, and it was bowed in the middle—he’d stretched it to reach the rear fender clip, and it never went back to its original shape. For PP parts, alignment is key before you attach anything. Hold the part up to the car first, and mark where every clip and mounting hole lines up with a piece of masking tape. Once you have all the marks, secure one clip at a time, wiggling gently to make sure it’s seated, but never pulling so hard that the plastic stretches. If a clip doesn’t reach, don’t use a screwdriver to pry it open—PP can snap easily. Instead, use a plastic trim tool (the flat, curved ones made just for this) to gently expand the clip opening by working around the edge, not jamming it into the middle. Trim tools are worth every penny; I’ve seen a $5 trim tool save a $300 side skirt, which is a no-brainer.
Clipping parts, by the way—this is the part that causes more returns than anything else. Not using the right clips, and not seating them correctly. A lot of installers will reuse old clips when they replace a part, which I don’t blame them for—old clips are cheap, but new clips are cheap too, and they’re designed to work with our new parts. Old clips can be worn out, brittle, or already stretched, so they won’t hold the new part as securely. We include the correct clips for every part we ship—we don’t cut corners here because we know mismatched clips lead to trouble. When installing a clip, don’t just push until you hear a “click.” Listen for that click, then grab the part and give it a gentle tug in the direction the clip is supposed to hold it. If it moves, the clip isn’t seated right. If the clip won’t seat, don’t hammer it in. That’s a fast way to break the mounting tab. Instead, check if there’s debris in the hole, or if the clip is aligned correctly. Sometimes a tiny bit of silicone spray (not too much, just a light coat) on the clip will help it slide in easier, without weakening the plastic. A quick note here: for hidden clips (the ones under trim or inside fender wells), use a flashlight to make sure you can see exactly where the clip is going. I’ve had more than one mechanic miss a hidden clip, spend an hour adjusting the part, only to realize they skipped one under the wheel well. It’s easy to do, so slow down and look.
What about heat? A lot of installers (especially DIYers) think using a heat gun will make plastic easier to work with, and it can—if you do it right. But heat is also the fastest way to ruin a part. Thermoplastics (the type we use) soften when heated, so too much heat can warp a part beyond repair, or even make it brittle. If you’re using heat to adjust a part after installation (say, a side skirt that’s slightly out of alignment), set your heat gun to the lowest setting—around 150-200°F, which is barely warm enough to touch to your skin—and hold it 6 to 8 inches away from the part. Move it constantly, never leaving it in one spot for more than 2 seconds. Once the part is soft enough to adjust, hold it in place until it cools completely (that takes about 2 minutes). If you leave the heat gun on high, or hold it too close, you’ll turn the plastic glossy, warped, or even make it bubble. I’ve had to replace a few parts that were ruined by a heat gun set too high, and it’s always avoidable. And a big rule: never use a heat gun on painted plastic parts. The paint will peel, blister, and ruin the finish before you even get the part installed. Let’s talk about finishing touches, because they’re what make the job look professional. Once the part is fully secured, step back and check the gap between the new part and the old one. For bumpers, grilles, and fenders, the gap should be even all the way around—no wide gaps on one side and tight on the other. If the gap is off, don’t force the part to align. Loosen the clips slightly, adjust the part, then re-tighten. For adhesive-mounted parts (like mirror backs or small trim pieces), wait the full curing time before you test the part. Most automotive adhesives take 24 hours to fully cure, even if they feel dry in an hour. If you yank on the mirror an hour after gluing it, you’ll pull it right off. I always recommend waiting the full 24 hours before washing the car, too—water pressure can affect the adhesive while it’s curing.
The last thing I want to stress is that mistakes happen, even to experienced installers. Last year, one of our long-time clients, a shop owner named Maria, called me panicking because a mechanic she’d hired had broken two mounting tabs on a replacement fender. Instead of getting upset, we walked through how to fix it. The mechanic used a small amount of epoxy formulated for plastic, sanded the broken tab lightly before gluing, and clamped it in place while it cured. The fender worked perfectly, no issues. The point is: don’t throw out a $200 part because of a small mistake. Take your time, follow these steps, and if something goes wrong, ask for help. That’s why suppliers like me exist—we don’t just ship parts, we give advice, because we want our customers to be happy and keep coming back.
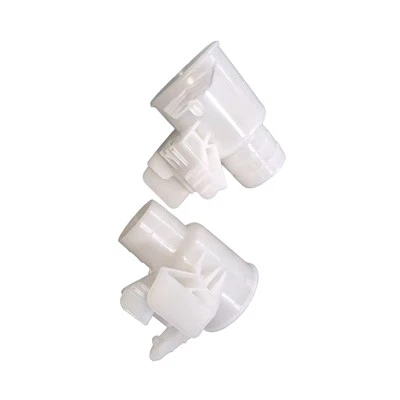
Automotive Plastic Air Vent Housing At the end of the day, installing plastic auto parts correctly isn’t rocket science. It’s about preparation, patience, and paying attention to the small details that most people skip. I’ve been doing this long enough to know that the best installs are the ones where no one notices the part—where it fits like it was made that way, no gaps, no wind noise, no coming loose. That’s why we design our parts to work with these steps, and why I always tell installers to slow down. Rushing is how you break parts, miss clips, and end up with a job that needs to be redone. If you’re installing plastic auto parts for a car, whether it’s your daily driver or a customer’s vehicle, take the time to do it right. If you have questions about a specific part, or need advice on an installation, feel free to reach out to your supplier. We’re here to help.
References
- Automotive Plastics: Properties and Applications, Society of Plastics Engineers, 2021.
- Best Practices for Adhesive Bonding Automotive Thermoplastics, SAE International, 2022.
- Plastic Trim Installation Guidelines, Automotive Service Association, 2020.
- Injection Molding Defect Prevention for Automotive Parts, National Institute of Automotive Service Excellence, 2019.
Ningbo Xiaohua Plastic Industry Co., Ltd.
We are one of the most experienced plastic auto parts manufacturers and suppliers in China, specialized in providing high quality customized service to global clients. We warmly welcome you to wholesale durable plastic auto parts in stock here from our factory.
Address: No. 878, Gulin Section, Yinxian Avenue, Haishu District, Ningbo City, Zhejiang Province
E-mail: 13736009355@163.com
WebSite: https://www.cnxiaohua.com/
